Scenario: You’ve recently self-published your first ebook, it’s doing awesome, and fans are clamoring for a print copy. You’re eager to oblige them, so you start formatting the book for print. But you just can’t figure out how to get those damn headers to cooperate with you!
Never fear, friend. I’ve got your back.
Note: I’m using Microsoft Word. These steps won’t make sense if you’re using a different program. Ye have been warned.
.
Step 1: Double click in the Header area of the page

Now the Header box opens! Huzzah!
.
Step 2: Get yo Header settings in order, son!
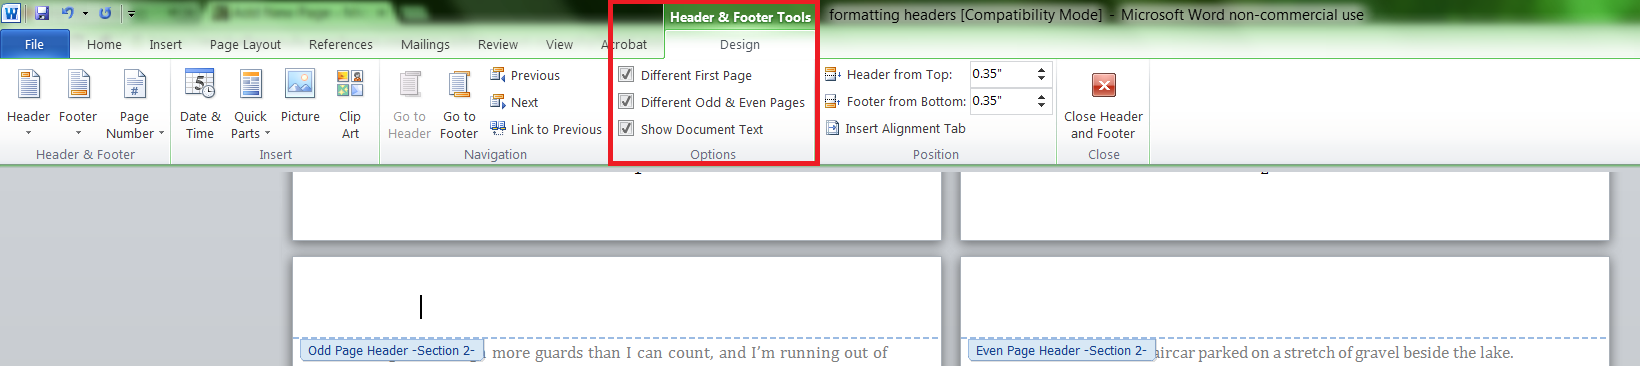
The Header & Footer Tools tab should appear once you’ve opened up the Header area. Click the Design tab and make sure the following boxes are checked:
- Different First Page
- Different Odd & Even Pages
- Show Document Text

Reasoning:
- Different First Page > This allows you to make the first page in each section have a different header than the rest of the section. The point here is to avoid having a header on the first page of the chapter, as it looks cluttered. (See this post for details)
- Different Odd & Even Pages > This lets you have your book name on the left page, and your author name on the right page (or vice versa!)
- Show Document Text > This one’s just for practicality. If it’s not clicked, your document text vanishes. Which is silly, so keep the box checked.
.
Step 3: Set up your sections
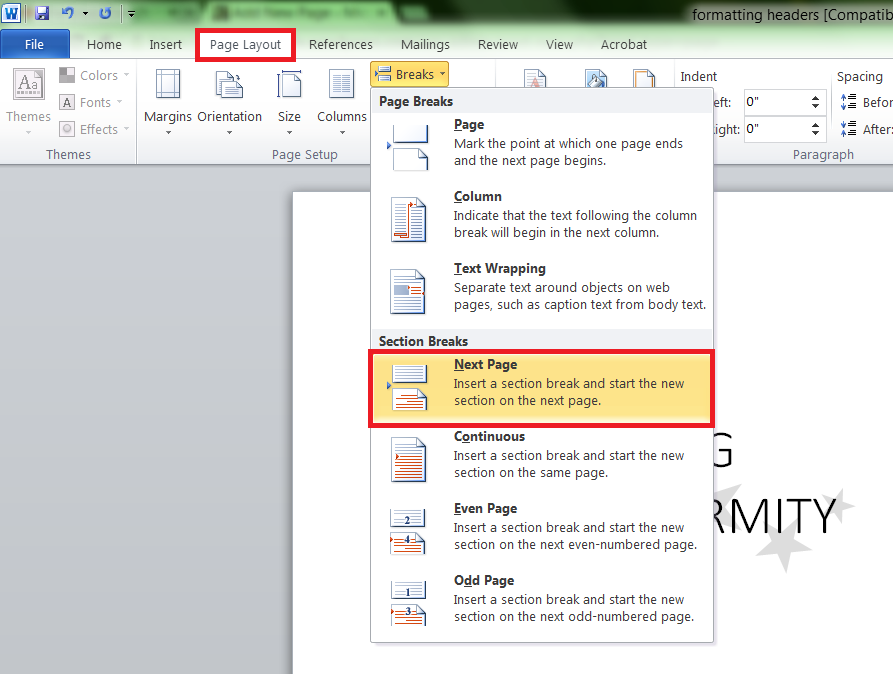
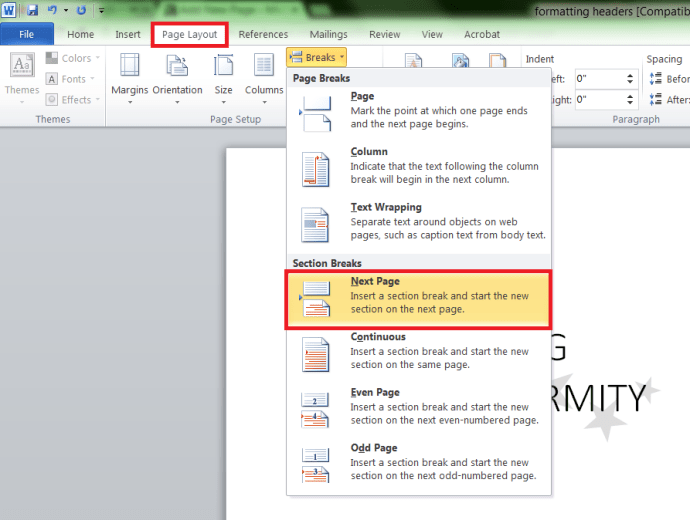
So Word has this tricky little function called “section breaks”. To get to it, hit the Page Layout tab and click “Breaks”. At the end of each chapter, click “Next Page” to start a new section on the next page.
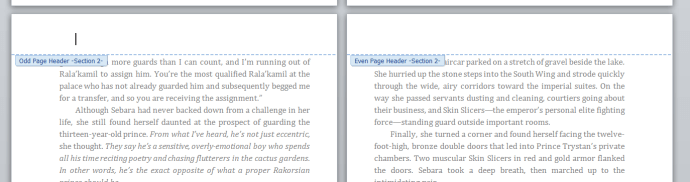
How can you tell if inserting the section break worked? On the Home tab, there’s a little backwards “P” button. Click it, and Word will show you all the formatting in the document. Like so …

So you need a different section for every chapter, along with a different section for all the stuff that comes at the start of your book (title page, front matter text, table of contents, etc.), and a different section for all the stuff that comes at the end of your book (acknowledgments, about the author, etc.)
Seriously, you need each chapter to be a different section. I’m not screwing around here. Do it. There are no shortcuts. Just make it happen.
.
Step 4: Let’s start at the top …
For the start of your book (title page, etc.), you don’t want any headers or page numbers. So leave the Header blank.
Easy, right?
.
Step 5: The first chapter
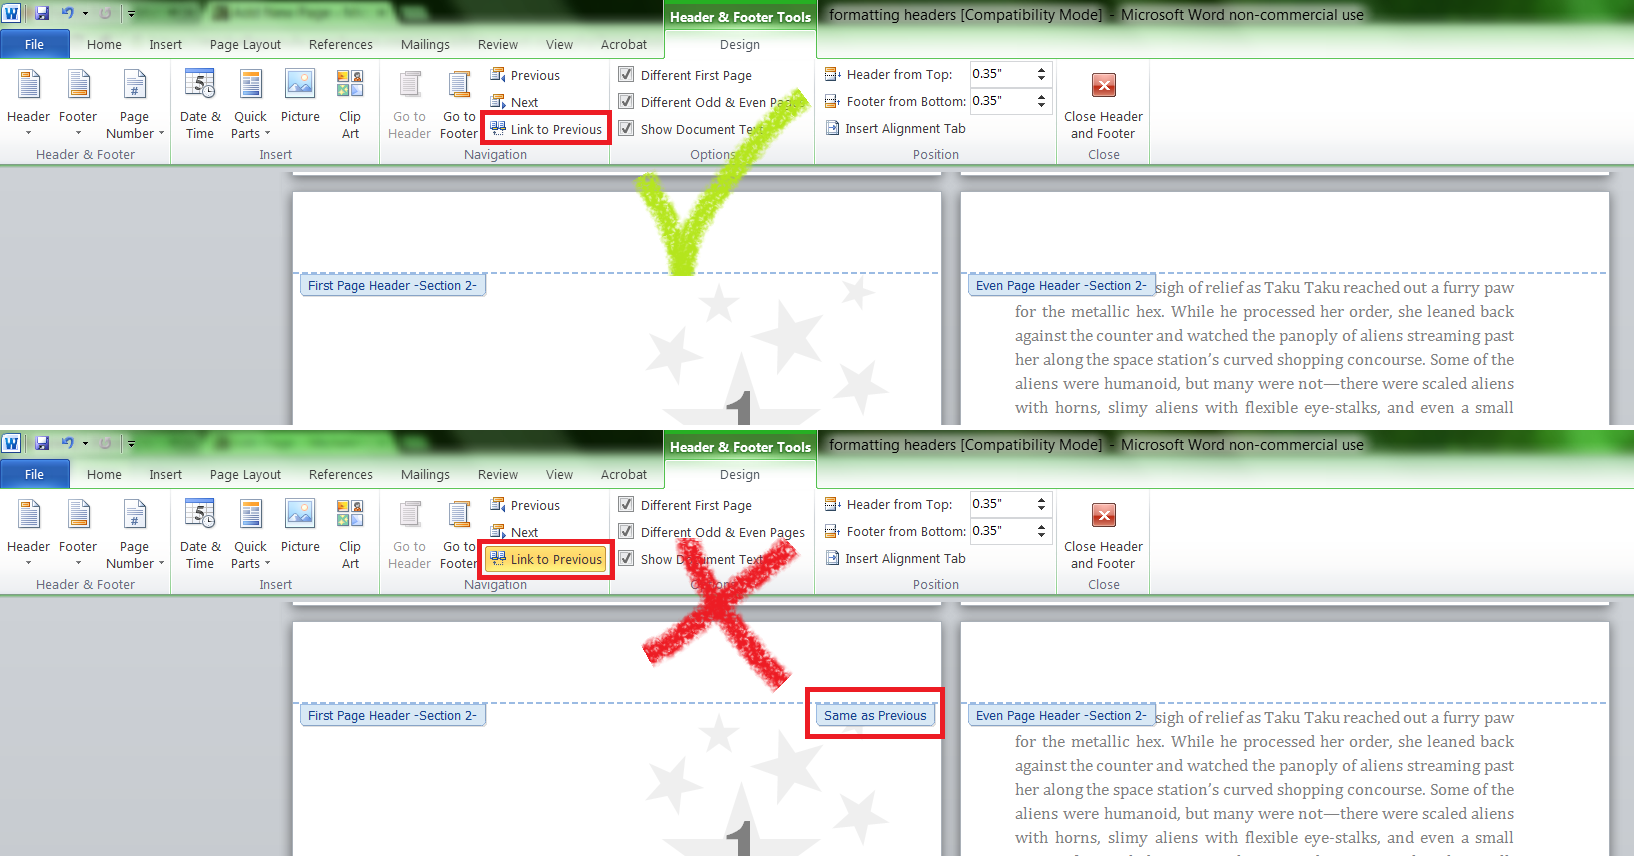
In the Header & Footer Tools tab, there’s a tricky little button called “Link to Previous”. For your first chapter, this needs to not be active. You don’t want to link your Chapter 1 header to the first section, because the first section is blank. That means your Chapter 1 header is also going to be blank. Which you don’t want. So make sure it’s not active!

Important! You need to deactivate “Link to Previous” for both the even and odd page header. Otherwise one will stay linked to the previous section, and therefore remain blank. Conversely, if you type something in a linked header, it will change all the text for both this section and the previous section. Which you don’t want.
Next up, you need to actually enter text into your header. Woo! Starting on the second page (remember that we don’t want a header on the first page of the chapter), type in either your author name or your book title (depending on which side you want each one). For the sake of this example, let’s say type in your author name.
 Now pop over to the next page and add in your book title. If you did this right, your name and title should appear on alternating pages throughout the rest of the chapter, but should not show up on the first page.
.
Step 6: Time to set up the rest of the chapters!
The rest of the book is really easy. In each chapter, enable the “Link to Previous” button on both the even and odd page. This should copy over the header text from the previous section (i.e. your name and title) and apply them to this section. Do that for every chapter, and boom! Header success!
.
Step 7: If you have non-story stuff at the end of the book …
If you have a section at the end of the book that you don’t want to have a header, just click your way into the Header in that section and disable the “Link to Previous” button. Then go into the odd and even headers and delete the text. Make sure you disable “Link to Previous” — otherwise you might delete the headers for the rest of the document.
.
But Michelle, what if I want a different header for every single chapter?
No problem! Just make sure “Link to Previous” is disabled. Then you can type whatever the heck you want in the headers for each section.
.
That’s it, folks! If you have any header formatting questions or issues, comment below and we’ll work it out. Word is a frustrating and enigmatic program, and will do random s*** to screw with your document, so you might run into problems that aren’t addressed here. For example, right now my Word likes to add a black line to the header when I delete text. Fun! So if you have any problems, let me know.
Happy Friday, and stay awesome!
.
Unrelated media of the day:
Courtesy of Imgur …